Blackmagic remote control
This article will describe a typical use case “Remote control of a wireless camera”, here on a Blackmagic URSA G2.
This event was covered by AVEO, APR , and LENI (France).
We will cover:
- Blackmagic URSA G2 camera control
- Haivision integration through their Data Bridge
- RIO with RSBM (Blackmagic SDI interface)
- RCP
- Tally input from an ATEM and routing to the remote camera through RCP and RIO
Backpack setup:
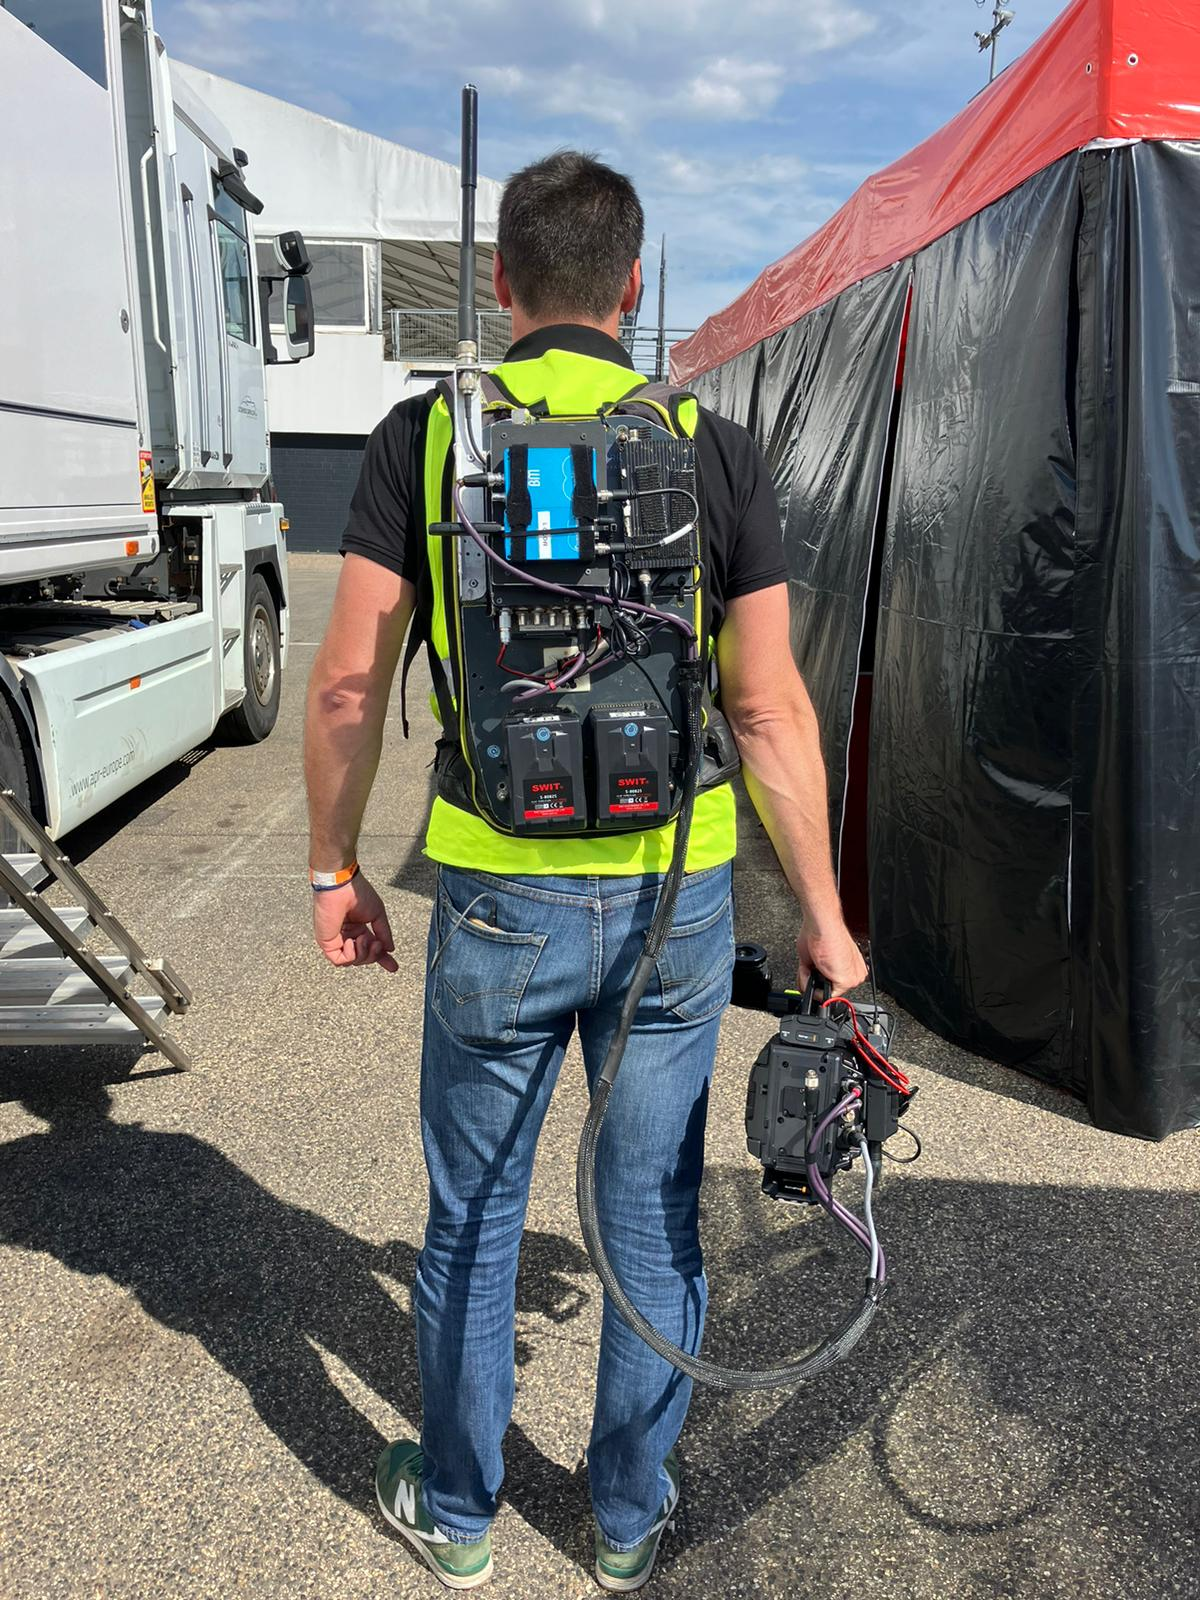
You can see:
- The RIO and the RSBM (blue boxes), provide camera control and tally output
- The Haivision encoding video and providing the Data Bridge to link RCP/RIO through the Haivision tunnel.
The camera wired to the backpack:
- power supply to a hot swap battery system
- SDI out, going to the Haivision encoder
- SDI in, coming from RIO/RSBM providing control of the camera and tally
RIO setup
Checking for update
It's always a good idea before a new season if you have time, to check for new updates.
You have all the new features and bug fixes. But it also helps find and fix the new ones. So you're helping the Cyanview community!
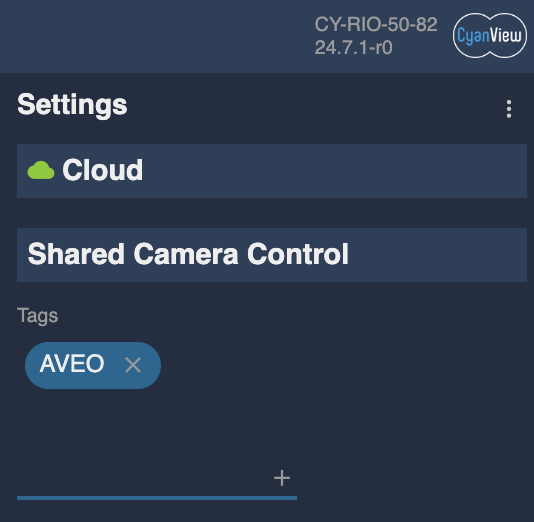
I updated my RIO:
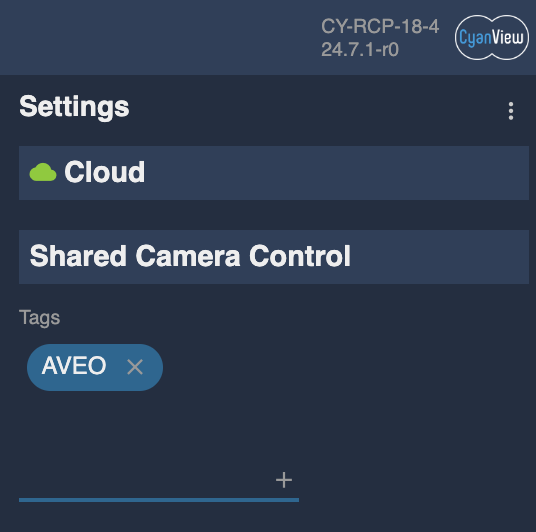
And my RCP:
RIO: Camera configuration
You can find more info here
I started with creating a Blackmagic bus:
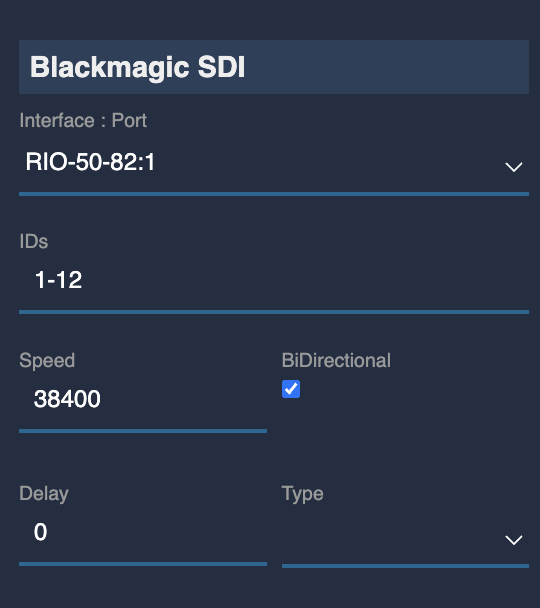
- In [Interface : Port], I selected my RIO (50-82) and on which port it's plugged (here, port 1, leaving my second port free)
- In IDs, I ensure to select a range big enough to contain my camera ID (my cam is ID 10, so 1-12 fits perfectly)
Now I can create my camera:
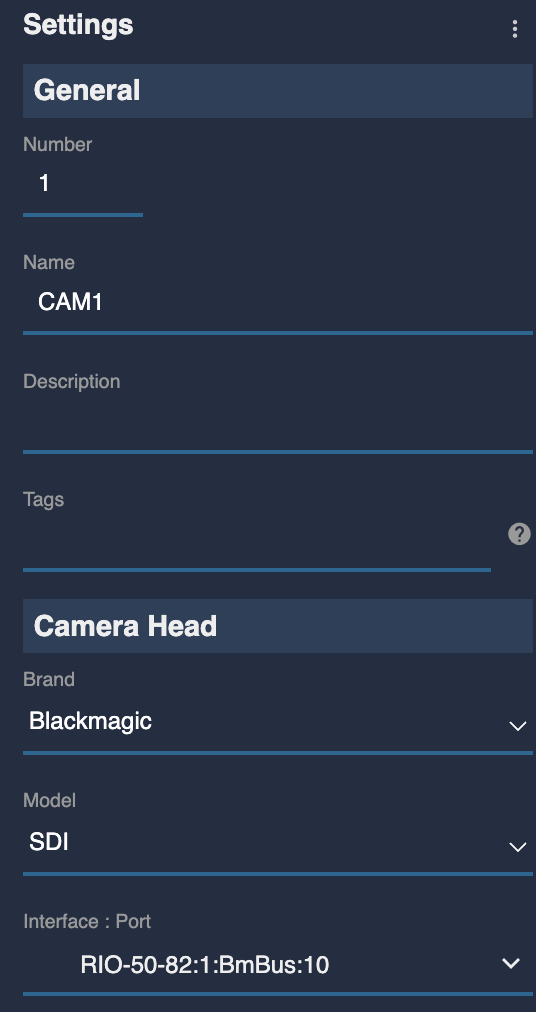
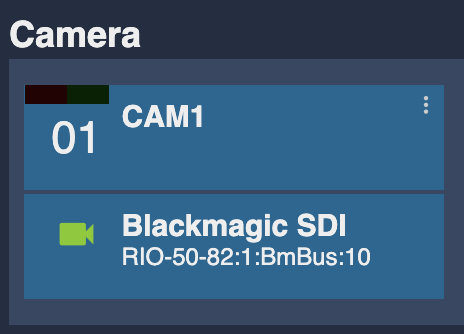
I have:
- a cam name (CAM1) and a cam number (1) to distinguish them properly
- a brand/model matching my camera (Blackmagic and SDI)
- and the interface here is the Blackmagic bus I created earlier, and I selected my cam ID (10)
This is green, so it's properly configured.
RIO/RCP REMI setup
The REMI is the protocol used between RCP and RIO.
It works:
- in LAN (Ethernet, Fiber, Wi-Fi)
- through Internet (Ethernet, 4G, etc.)
- RF
And in our case here: through the Haivision Data Bridge.
The advantage of the data bridge in our case is that:
- Video and telemetry are “linked” (you don't have a situation where you have video, but no telemetry)
- No hassle with 4G modems and SIM as you're using the Haivision data plan
We add a REMI tag (mix between a group and a password) in our RIO:
I add the same tag in my RCP:
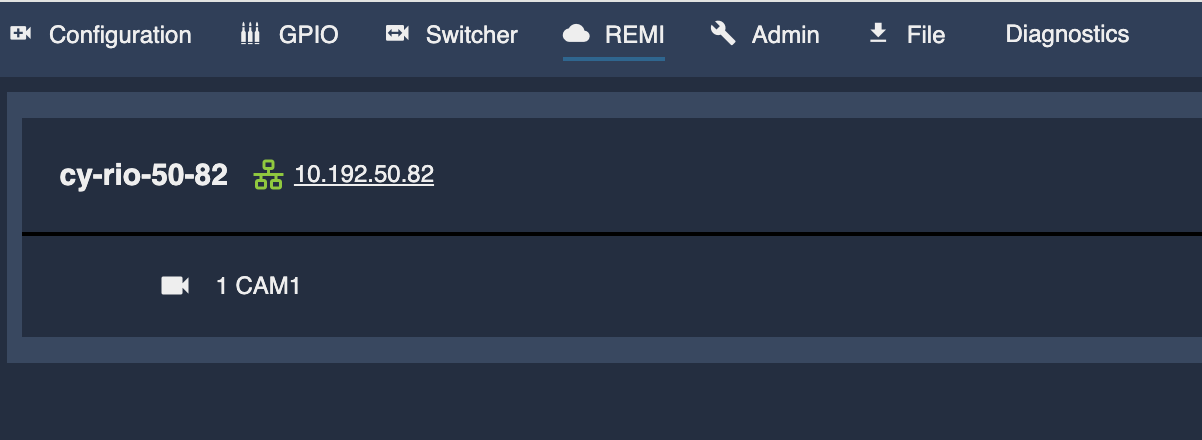
And now the RCP automatically discovers and lists RIOs, RCPs, and shared cameras:
Once the cam is selected, it's imported into my RCP and I can control it:
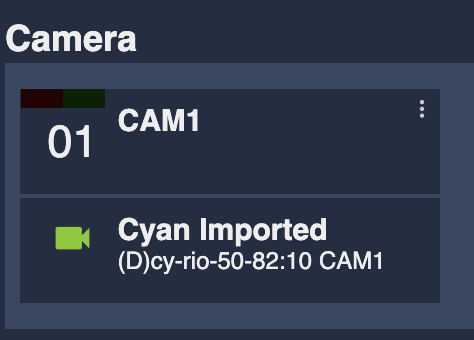
NOTE
You see that in RCP, it's an Imported camera. It's because the camera is really controlled by the RIO. The RCP is just sending/receiving information through REMI, but the camera control with the camera protocol is done on RIO side. Reducing latency and improving stability.
Haivision Data Bridge
This is not covered here, as it's too specific to your kit and setup.
You can find more information in this integration guide
But it more or less looks like this in our setup:

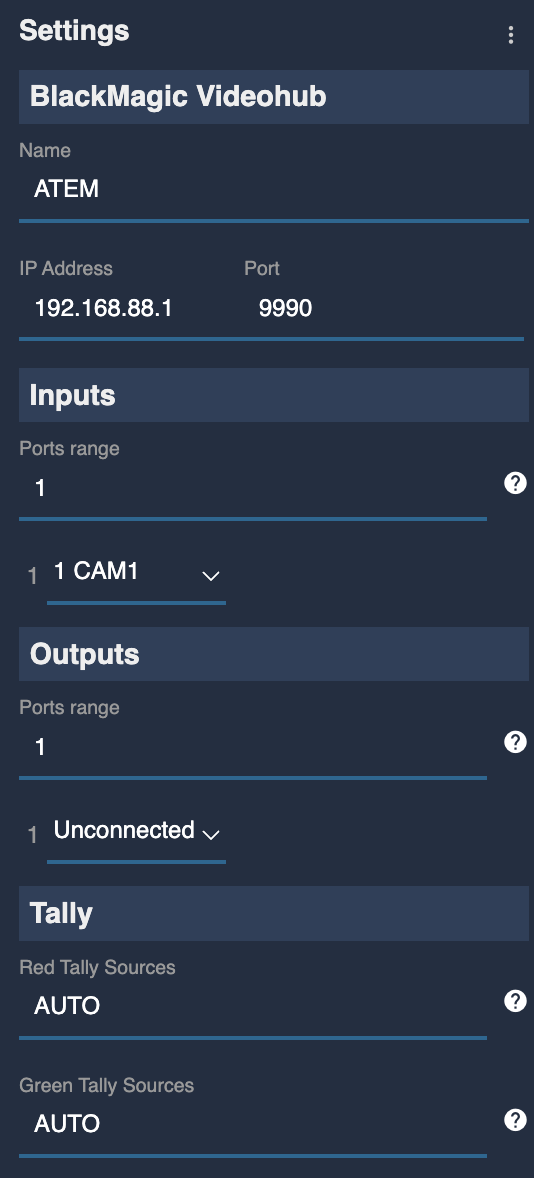
Tally input from ATEM
You can find more info on this guide
You can see:
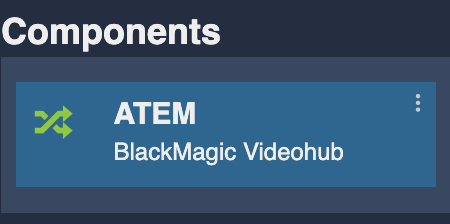
- I added my ATEM in the component section
- I set up a name (ATEM, could be whatever you want)
- The IP (192.168.88.1) of my ATEM, ensures it matches your RCP network
- I link my camera 1 to input 1, this allows us to properly route tally
- I set up tally red and green to “AUTO” to receive tally from ATEM
And that's all, RCP will now receive tally info and route it to your camera.
NOTE
I don't link my RCP to any output, as I just have 1 cam. But if you have more than one cam, you can preview your RCP cam selection on an aux output